Inspection & Measuring

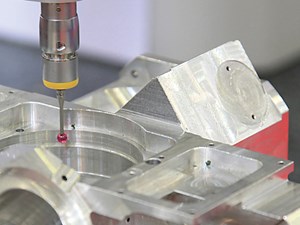
The tolerances and surface finishes for modern machined parts are becoming increasingly stringent, meaning advanced measurement and inspection devices such as gages, vision systems and CMMs are necessary.
Narrow by Inspection & Measuring Product Category
- Autocollimators
- Balancing Machines
- Borescopes
- Calibration Equipment
- Comparators, Optical & Other
- Coordinate Measuring Machines (CMMs)
- Coordinate Measuring Machines, Portable
- Data Collection Devices for Gaging, SPC, etc.
- Flatness Measuring Equipment
- Flaw Detection Equipment
- Gages, Electronic/Digital
- Gages, Mechanical
- Gear Inspection Equipment
- Hardness Testing Equipment
- Interferometers
- Laser Measurement Systems
- Leak Testing Equipment
- Material Testing & Analysis Equipment
- Probes, Electromechanical
- Refractometers
- Roundness Measuring Equipment
- Surface Finish Measuring Equipment
- Surface Plates
- Tool Presetting Equipment
- Vision Systems
- Weight Scales
FAQ: Inspection & Measuring
Does my shop need a CMM?
Coordinate measuring machines (CMMs) have been around since the 1960s. In most precision manufacturing facilities, the CMM is the company’s chief dimensional measurement device that is traceable to the standards maintained by National Institute of Standards & Technology (NIST). Most CMMs are used to verify dimensional accuracy for quality control (QC) and first-article inspection, the function of checking the first part produced by a manufacturing process to verify that it is meeting tolerance requirements. Inspection with a CMM provides data for in-process measurements to ensure dimensional integrity from operation to operation and to satisfy traceability requirements. CMMs are also used to perform gage repeatability and reproducibility (R&R) studies, 2D and 3D scanning, part sorting, reverse engineering and a host of other tasks.
By some estimates, the global installed base of CMMs is about 150,000 units. Because of the typical air-bearing design of many CMMs, the structure of these devices seldom wears out. Therefore, the lifespan of a CMM may exceed 30 years. Many 30-year-old CMMs are used daily throughout the precision manufacturing world. Older CMMs can be easily upgraded with new electronics, drives and the latest software, adding an extra 10 years to a machine’s usable life. In fact, a CMM can be retrofitted multiple times to extend its life even further.
During the past several decades, CMMs have become faster, more accurate and more affordable. While there has been much speculation that CMMs are becoming obsolete, the opposite is true. Today, CMMs are more versatile and functional than ever before.
(Source: Buying a Coordinate Measuring Machine: CMMs Past and Future)
What is GD&T? (or geometric dimensioning and tolerancing)
GD&T is a language for part designs that uses context and symbols to characterize the imperfections allowed in each part feature.
(Source: Decoding (Not Interpreting) GD&T)
Should I balance my tools?
Ask anyone who has ridden in a centrifuge. As rpm increases, centrifugal force increases even faster. In the same way, any unbalance in a spinning body—say, a milling cutter—generates more force as the body spins faster. In shops making the transition to high speed machining, thoughts quite often turn to tool balance. Should you balance your tools? A more balanced system of tool, toolholder, and spindle can net several advantages. These range from extended tool life and less downtime for spindle maintenance to tighter machining accuracy and better surface finish.
But not every shop will realize these benefits, and others will find the cost too high. Tool balancing adds another step in the process—potentially several steps. It typically involves measuring the unbalance of a tool/toolholder assembly (on a tool balance machine), then reducing this unbalance by altering the tool—perhaps by machining it to remove mass, or by moving the counterweights in a balanceable toolholder. The often-iterative procedure can also involve checking the tool again, refining the previous adjustment, and so on until the balance target is achieved.
There is also an inventory cost. Tool and toolholder are balanced as a single unit, so shops performing tool balancing must store and track balanced tool/toolholder assemblies.
In other words, tool balancing—like everything else—merits a cost-benefit analysis. And while new technology may affect the way balancing is performed and justified, the need to perform this analysis is unchanged.
(Source: Should You Balance Your Tools?)


